A couple of weeks ago I posted my very first cake tutorial discussing the prep work that goes into creating a pretty cake. Well, this week I am going to show you how to ice a cake and get a clean, smooth finish.
This week happens to be both my sister and sister-in-law’s birthday. Busy week at the Bridgforth house!
My sister (Whitney) was up first. Whitney has simple tastes. No matter how creative I get with cake flavors she still prefers Funfetti from the box. When she gave me cake ideas, she said “I like Frozen, puppies, and turtles.” I won’t tell you how old she is…. 😉
This cake was for her.
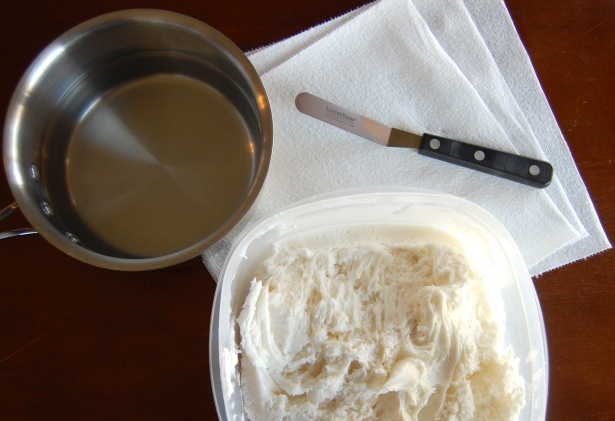
To begin, here’s what you’ll need:
- A saucepan of simmering (HOT) water
- Small spatula
- Viva paper towels (very important to get Viva, you’ll see why)
- A big tub o’ icing
- Not pictured: a bowl or someplace to scrape your spatula off
At the end of the last cake post I mentioned putting my cake in the fridge to settle, and to also set the filling. At this point my cake is cold and the icing is set, so it’s not going to slide around while I ice the sides.
We are going to do 2 layers of icing on this cake. 1.) Crumb coat – this layer is going to be thin, and is going to seal in all the loose crumbs. 2.) Final coat – this layer goes on thicker than the crumb coat, and is going to give that nice, smooth, clean finish.
Note: You use the simmering water to heat your spatula. A warm spatula spreads the icing much smoother. I do this between nearly every swipe I make on the cake. Dip the spatula in water, wipe it off with a paper towel. Keep doing this throughout the icing process to ensure a smooth finish. Keep your extra bowl close, to scrape off excess icing as needed.
Crumb Coat Stage:
- I like to pipe around the seams of the cake. Sometimes my dam doesn’t go all the way to edge, and I want to fill in this gap before I begin icing.
- With a HOT spatula begin working your icing into the gap.
- Smooth out your seams.
- Now just take globs of icing (that’s a precise unit of measure) and place them around THE SIDES of your cake, I do this every several inches.
- With a HOT spatula, begin smoothing out your globs.
- Work out all the icing until the sides are completely covered. Scrape off any excess icing into your bowl, make sure you don’t scrape it off in your clean icing. At the end of this stage, you want a lip at the top of your cake. The icing will be about 1/2″ taller than your cake – THIS IS IMPORTANT, don’t smooth out the lip.
- Place a glob of icing on the top of your cake, and smooth it out. Smooth the icing to the edge of the cake, where it meets the lip.
- With your icing pushed up against the edge of the cake, using a HOT spatula, begin dragging the lip of icing toward the center of your cake.
*Smooth out the sides/top as necessary with a hot spatula. It doesn’t have to be perfect just yet.*
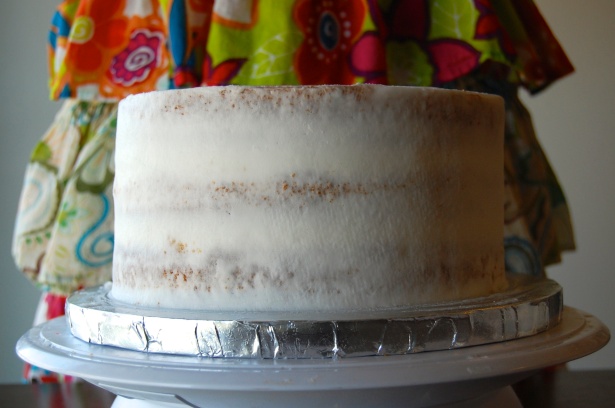
Here is my cake once the crumb coat is complete. It’s a light layer, you should be able to see through it. Pop this in the fridge, for 30 min. to an hour to set.
Step 2. Final Icing Stage
Using the same process as above (I won’t bore you with the same pictures), we are going to add a thicker “final” layer to our cake. This is where the pretty happens.
- Add your globs of icing to the crumb coated cake. Begin at Step 4 in the instructions above.
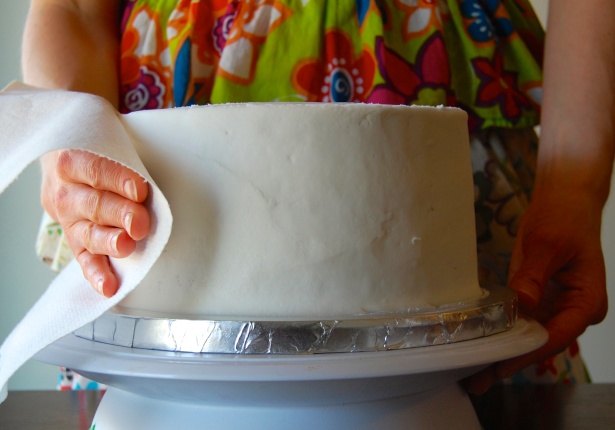
- This is my finished cake after I smoothed out the icing with a hot spatula. I left this mark in the center to show you how we get a completely smooth finish.
Take your Viva paper towel (VERY IMPORTANT. Don’t use another brand), place it on the side of your cake, and begin gently rubbing up and down. When I’m not trying to take pictures of myself, I will usually use one paper towel in each hand and double time it.
Note: You can do this on butter based icing as well, but put the cake in the fridge for just a few minutes before you begin to rub it.
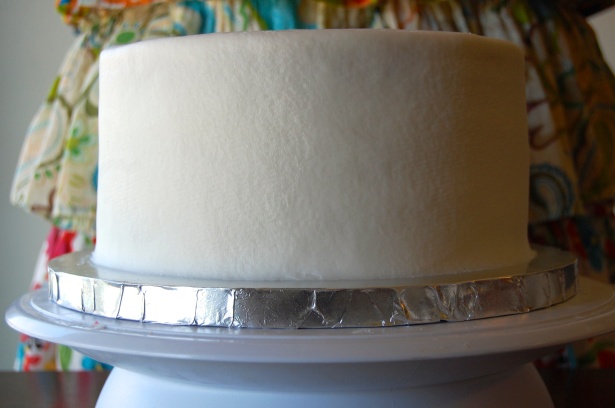
And… Voila! Smooth cake. The Viva paper towel trick works every time.
And, here’s the final cake.
I tried to make a grown-up Frozen cake because she is not 12 like my description might have led you to believe. I’m not sure it’s possible, but a few people at the restaurant did ask if it was Breaking Bad cake, so maybe it worked?!
After the last post, I received requests for a butter based icing recipe, as well as a shortening based recipe. You ask – I deliver. Here are my tried and true basic icing recipes:


Thank you so much for sharing your recipes, tips, and tricks with us!! You’re the best!! Love you little!